HW heater winterization.
Visibility Public
 by
Norm Pierce
Plumbing
4 photos
4894 views
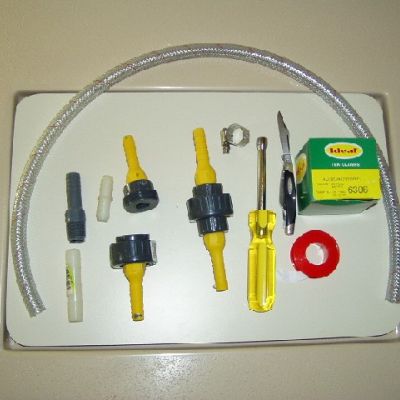
Picture "A"
Tools needed:
(1) Sharp knife to cut hoses.
(1) 5/16 Nut Driver. NOTE: Anyone attempting to use a Screwdriver on a hose clamp will eventually
find a leak in their cardiovascular system requiring much rigging or electrical tape to secure and
leaving a mess to clean up..........use a nut-driver.
(2) Pair Water Pump / Slip Joint Pliers to assemble the PVC unions and 1/2" pipe to hose adapters.
Time needed: Less time than it took to type these directions !
From the hardware store purchase:
(2) 1/2" Threaded PVC Unions
(1) Roll Teflon pipe sealing tape
(1) 1/2" hose to hose joining double nipple. NOTE: Most white nylon and gray PVC available at the
hardware store are for plastic pipe not hose and will not go into the red-stripe hose as they are
actually 9/16" OD so check for fit before you buy. Note the different size evident on the left of
the picture.
From the marine supply store purchase:
(3) Feet 1/2" red-stripe FDA clear hose.
(6) All stainless hose clamps for 1/2" hose.
(4) 1/2" pipe to 1/2" hose adapters, yellow or black. See note above.
PREASSEMBLE:
The (4) 1/2" pipe to hose adapters in the PVC unions using the Teflon tape on the
threads. Note that each union has a male and female (loose threaded ring) side.
The 1/2" hose to hose nipple into the 3' of 1/2" red-stripe hose you purchased.
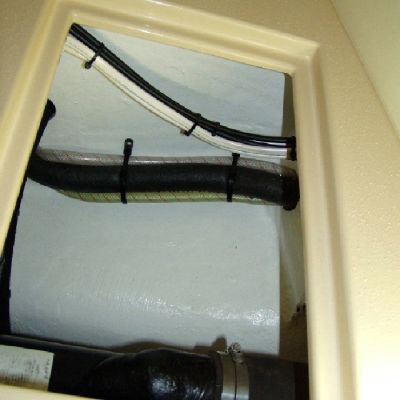
Picture "B"
In the area aft of the engine compartment (where the muffler and stuffing box are located) there are
three red stripe clear hoses on the starboard side. The insulated one is the hot water from the
heater; the two non insulated ones are cold water supply to the cockpit shower and the water heater.
IMPORTANT: Absolutely determine which one is the cold supply to the water heater. In the one
pictured here it is the bottom hose, but may not be in your installation.
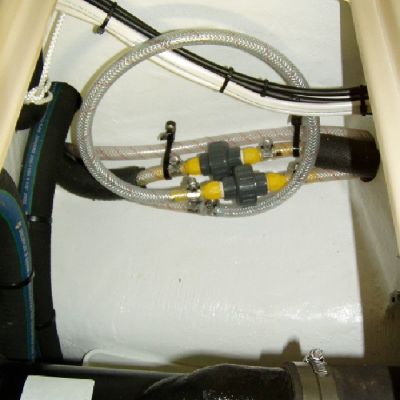
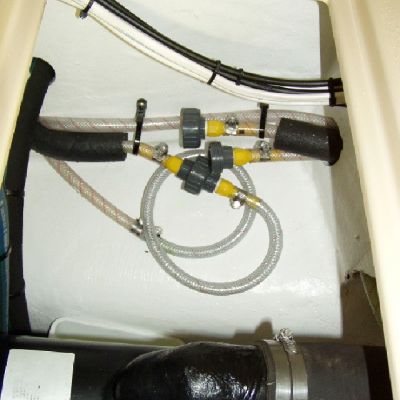
Picture "C"
CAREFULLY cut 12" of insulati